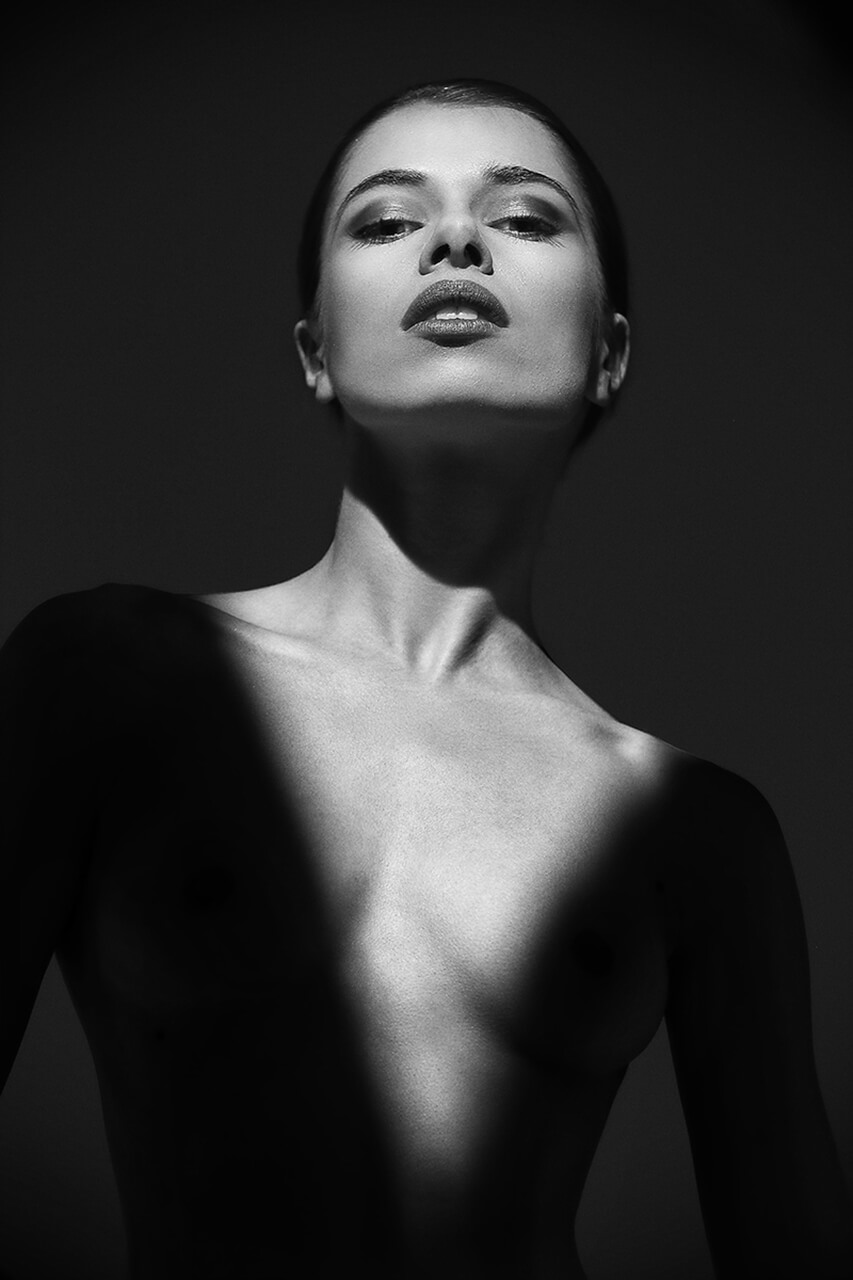
The source of inspiration for my work comes from George Mayer, who was an outstanding Russian photographer born in 1985, and who produced several series of beautiful photographs. Although Mayer conducted many experiments with double exposures, mirrors, colours, shadows and geometries, he particularly took several shots of many models, ‘drawing’ shadows on their bodies and often combining them with luminous geometric figures. A long time ago I wanted to experiment with these possibilities to further enhance my competence, and so included the possibilities of using light cuts, along with projected shadows that would be placed on the body with precision. It was from these experiments that I took this photograph of Chiara Bianchino, dressed in an elegant ‘black dress’.
For me, using a classic light projector wasn’t an option because, for me, I’ve seen this done so many times. That doesn’t mean to say that I won’t be doing so in the future, as it could be used to recreate another type of effect.
I chose to reflect on the technical questions, and asked myself: instead of using shadows, why not use the light? But, as always, my instinct is to simply get on with it and experiment so I really shouldn’t have been asking these questions of myself. So, after a few days, I immediately set to work on finding out whether this was feasible.
The results were pleasant, with the minimum of visual coherence. In this photo with Chiara, everything’s in the shade and therefore underexposed; compare this with the light hitting her face, which almost renders it totally invisible. The photo that I’d originally planned would have been the opposite; it would have been necessary to use overexposure, with the light hitting the naked body in a way that it loses its visibility. Basically I would have recreated a white dress instead of a dark frock, and so I’d be illuminating the part of the body I wanted to ‘draw’ on.
Now, as I often say, soft and hard light are easy to obtain. It all depends on the source that’s emitting the light – indeed, its size. Now I’ve often noticed that, while correcting a shadow that’s a little too hard and detailed – perhaps on the face – many photographers tend to withdraw the light source in respect to the subject, as if the light is the cause of that unwanted shadow. This is nothing more than wrong. Hard light is created with a small emitter; a soft light with a large emitter. What I mean by an emitter is that, large or small, I don’t mean anything other than the shape of the light source.
If I keep a sled flash, called a speedlight or a cobra, uncovered and without any diffuser, then I'm working with a light source that’s only a few centimetres; now that’s very small, and will generate very marked shadows. Now if I insert the same flash inside a very large softbox, I’ll generate a softer light which will be as soft as the softbox would be. It remains clear that the softbox should work well and not reflect any small portion of light collected.
But there is another very important factor that determines this phenomenon – the distance of light from the subject. In fact the size is relative to the light / subject distance. If I use a softbox to soften the light, I need to have this placed at an appropriate distance. If I move this ten metres away from the subject, the results won’t be what we have intended. To explain: the sun is bigger than the earth, but it’s very far away, so it’s a light emission produced by a ball up in the sky. It’s generating very hard and marked shadows. But there are hours in the day when it is beautiful, shining in the middle of the sky and at a certain height. There are times when this light is softened, often because of plenty of cloud cover – as if there was a huge softbox over our heads – but we mustn’t confuse scenes with strong contrasts with scenes illuminated by harsh light.
Strong contrasts can also be generated with a huge softbox positioned several centimetres away from the subject and then lit with a soft light. A hard light’s best used when there is clear and fast transition from bright areas to shaded areas; soft light has very gradual and nuanced transition from bright to shade.
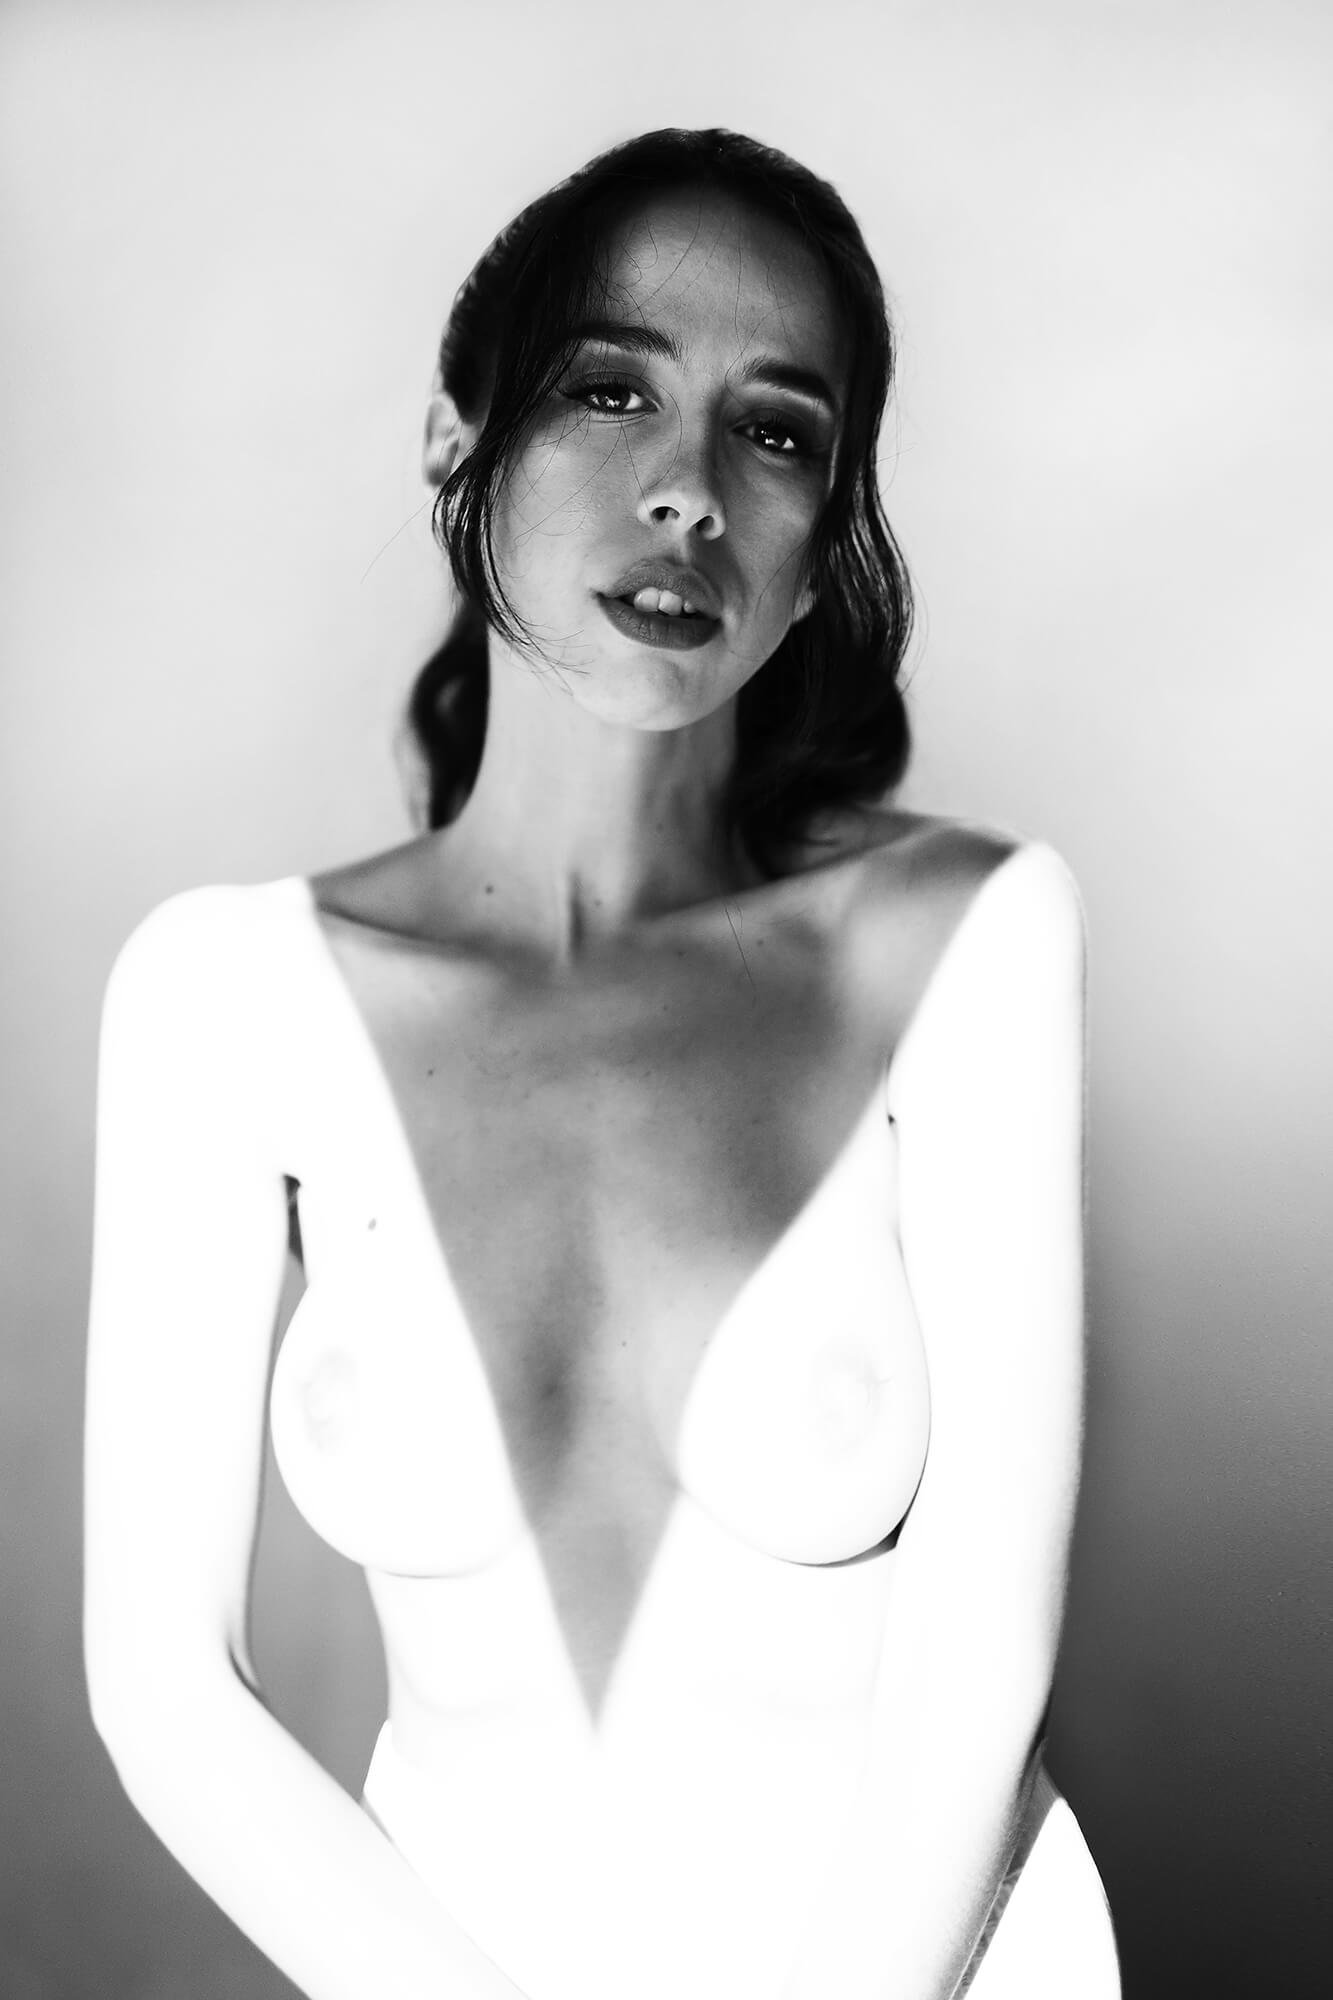
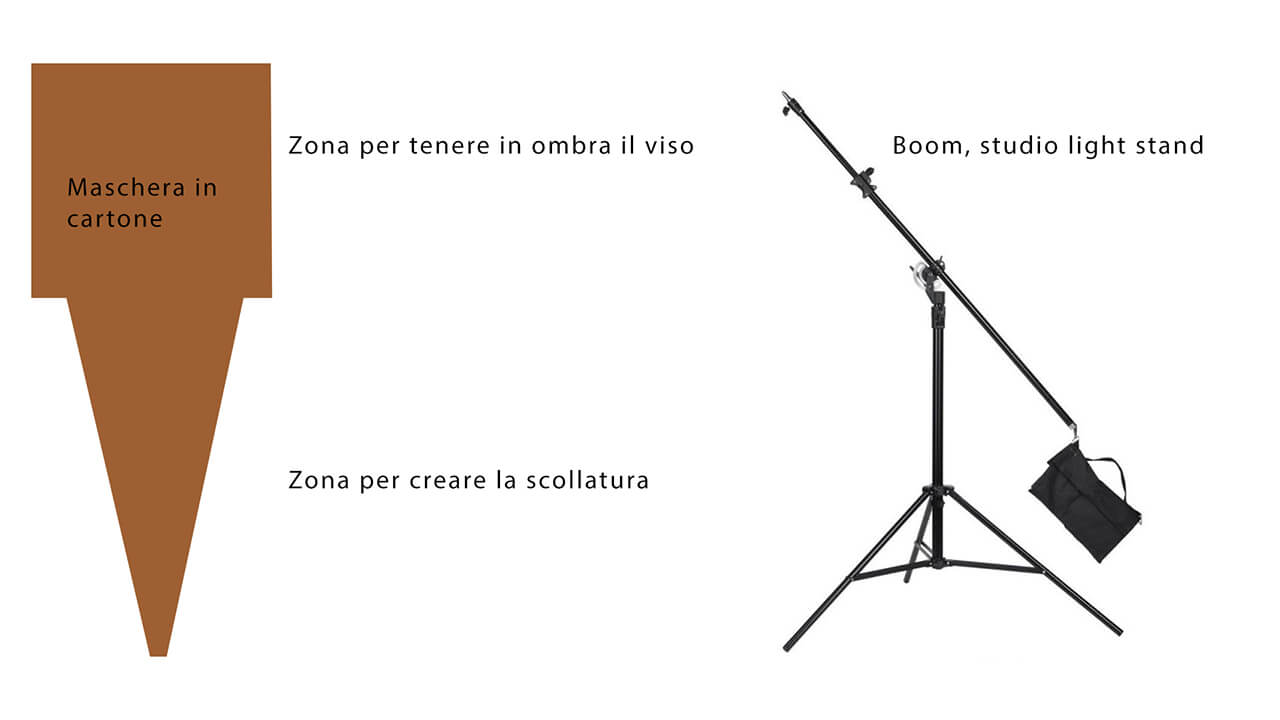
So, having made these necessary clarifications, I’ll go back to describing the image on the cover. Now this wasn’t easy to do as it took me a while to get everything calibrated. I used only one artificial light, although there is a bit of natural light coming in from a window in the studio. I positioned a continuous light Quadralite LED (click on the link to see the specifications), and I cut out a cardboard mask, which would allow me to avoid lighting up the face and the neckline of the hypothetical dress of Simona. These parts are not illuminated by the LED, but they are visible because they are illuminated by the light that I’d let into the room.
I have to be honest, though, as most of the difficulties of the setup revolved around the model, who had no real opportunity of being able to move and express herself.
Now all I had to do was to "only" find the right exposures and the correct distances.
But why am I talking about distances? Because, in addition to having positioned my LED without the aid of any kind of modifier (which gives a lot of discomfort to the subject) – set at the correct distance not only for the most marked shadows possible, but also to have a quantity of light necessary so that I could overexpose the areas of the illuminated body.
I had to take care of two other very important aspects. These were the distance of the subject from the colour grey 18 backdrop, so as not to have shadows cast on it, and the distance of the mask made of cardboard, from my subject. In addition, these determine the precision of that contrast between light and shadow, which is crucial in allowing have the perception of the skin becoming fabric. The transition must be very clear. In order to achieve this, the mask, or any kind of body that casts a shadow over the subject, must be positioned very close to the subject.
We can do a simple test just using a mobile phone torch. This has a very small light emitter, the LED, and we can point this at a wall and observe what happens when making a shadow with our hand. If we put our hand near the LED we’ll get a big shadow, but the contours won’t be very defined. But when we put our hand to the wall where we project the light, the shadow will become smaller but will be very defined in the contours.
Now let's leave our hand at a very close distance to the wall. If we bring the LED closer to the hand, the shadow will enlarge and start to lose some detail at the edges. If we pull away from the LED, the shadow will be well defined but we’ll start losing more of the brightness of the light the further we move away. It's the same thing that I had to do in the studio.
Position the LED light at a considerable distance, but don’t overdo it so you lose the brightness. Place a cardboard mask – close enough to the subject – so that it has very detailed edges, those edges between light and shadow, and also ensuring that the dimensions of the shadows were consistent with the design I wanted to achieve.
At this point I kind of felt a little cheated; because the lack of any perfect clarity of the dress and leather step, I blurred it using an open diaphragm, keeping the focus on the face. Now I could have photographed using a smaller aperture, but even if I had very little light I would also have had to use something of an even higher ISO sensitivity, generating a little (manageable) grain or having to photograph with techniques that would allow this light to be reduced, enhancing any problems. I remembered that the correct exposure is in the shade; the face is illuminated by a weak light that had entered the studio.
The mask had more or less the shape you see in the photograph, and I attached it to a boom in order to keep it suspended in mid-air. Doing this allows you to position the lights inside the set without having the bulk of the stand in your field of view. You can also place it in a perfectly horizontal position.
Obviously I shouldn't have cast a shadow on the subject either, so I had to place the LED high enough in order to reduce the bulk of my shadow. But finding the right position of everything just further added to the complications, and as a result the cardboard mask wasn’t framed. As a result, this has happened, more or less.
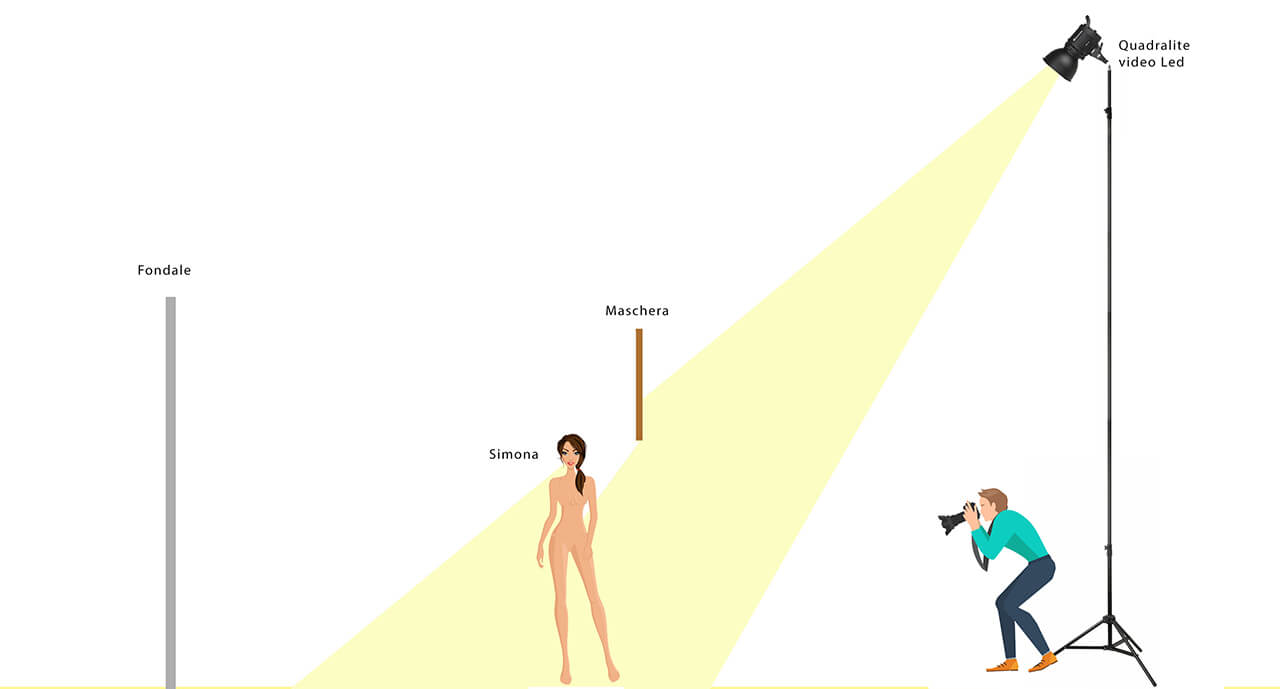
Well, I have to say everything’s perfect in my dreams as everything fits! But when we look closely at the scheme, the way I saw things, the installation room should really have been eight metres in depth, six metres in height, by eye. I took this photograph in a room that was less than five metres depth and about three metres in height. But when I worked with Chiara, dressing her in shade, I had fourteen metres of useful depth and it was all a lot easier! So how did I do it?
Here, I had to assume absurd positions in taking the shot, placing the LED at the limit of what is possible in physics, being stuck between the ceiling and the wall opposite, and projecting horrible shadows from which I then had to work on in post-production. In practice, I should be showing you a series of shots that I actually took, and so revealing the suffering there was having to calibrate light and shadow, correct exposure in the shadows and having to let my model enter the frame. A model who has to have an infinite amount of patience.
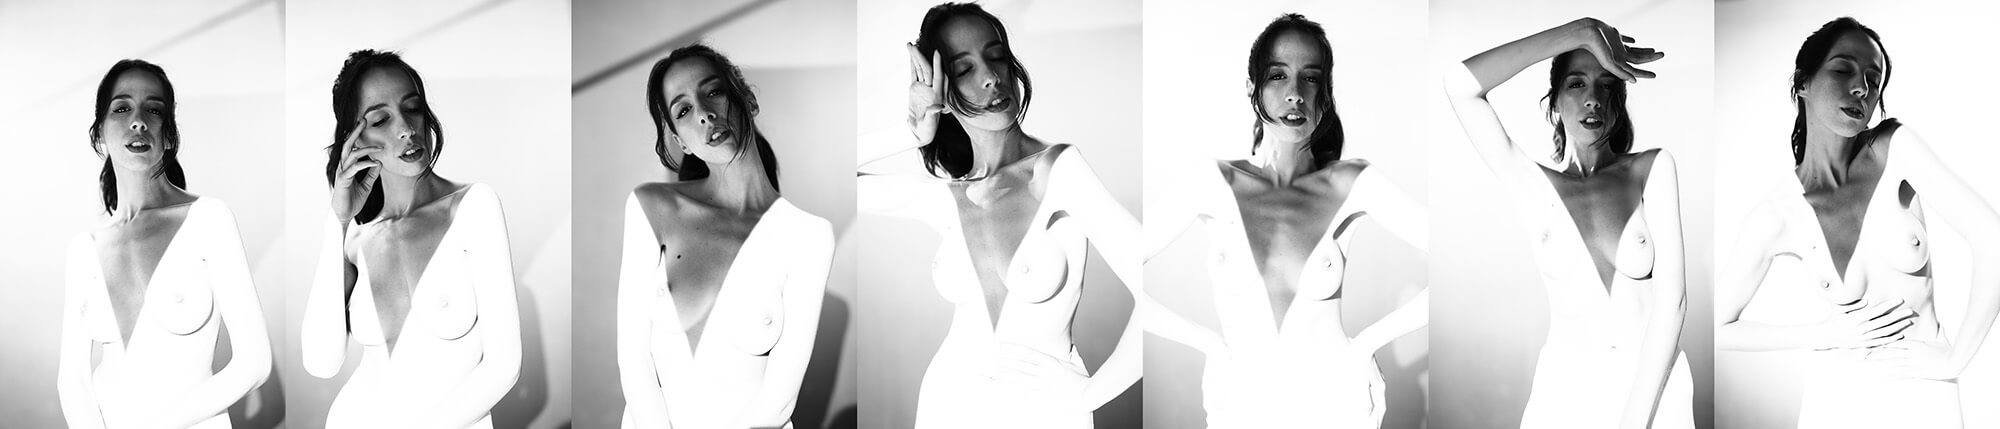
In some tests, as can be seen from the test series above without any post-production, I tried to clean up the background from the shadows by using another light, but I could only get an overexposed background, which merged with the model's body. I was working hard having to correctly expose something with very little light, so any other source of light, even of low intensity, would have tainted the scene and made the work more difficult. I opted to keep the shadows at the base and then clean up in post-production if I found these really distracting, or whether to keep them.
Just to be clear: if I have to do a work in black and white, then I shoot in black and white with a personalized preset that I will discuss in a future article. Then when I publish such a series of images it’ll be nothing more than a collage of some jpegs taken directly from the room.
It was the final image that I was most satisfied with as it showed how I’d designed it, that the whole thing was really feasible, and that it also gave me the opportunity to reflect on some aspects of a conceptual nature, related to what we see and what we don’t see, and in the shade and in light. Of course I didn't stop there, but it was from this point that I started making more precise creations by combining shadow and light.
So I hope that, by sharing the results of this experiment, this will inspire you to be more creative with your productions or, more simply, that I’ve been able to clarify or confirm some aspects related to light. You can find many of my other achievements on my Instagram account at raffaeleingegno, or by searching for #dressinlightandshadow.
Article and photos by: Raffaele Ingegno